

Katie's Gardening Tips

The following gardening tips have been taken from back issues of our E- newsletters. If you are not signed up to receive our regular E-newsletters throughout the season, you can subscribe here.
We hope you find the tips helpful! Please feel free to contact us with any other gardening questions that you may have, you never know...we may turn it into a tip!
 Amaryllis come in many beautiful shades of red, pink, white, salmon and orange. Originally from South America, Amaryllis bulbs are fast and easy to grow indoors during the winter. They reward you with huge, long lasting, bold flowers on tall, sturdy stems. They are easy for children to grow and our kids love to grow them for their teachers every winter. If you have an Amaryllis that has finished flowering, it can be made to flower again by following this procedure:
1. Cut down the flower stems, and continue to water and fertilize the leaves for about 5 - 6 months. After all danger of frost has passed in June, plants can be placed outside to continue growing in the sun and fresh air.
2. Bring the plant indoors in September or October, before the first frost. When the leaves begin to yellow, cut them back to about 2" above the bulb.
3. Now you can either remove the bulb from the pot and place in a cool, dark place such as the crisper of your fridge or leave the bulb in the pot and place in your basement - also cool and dark. The bulb now needs at least 6 weeks of rest.
4. After the 6 week rest period the bulb can be started growing again with light and water. Allow 8 weeks for blooms. Have fun!
 1. Light Requirements: Will your container be growing in full sun, part sun or full shade? Ensure you only use suitable plants.
2. Plant Habit: When choosing plants, include a 'Thriller', 'Filler' and a 'Spiller'. This combination of an exciting upright plant, a few mounding fillers and a few trailers is a great method to remember.
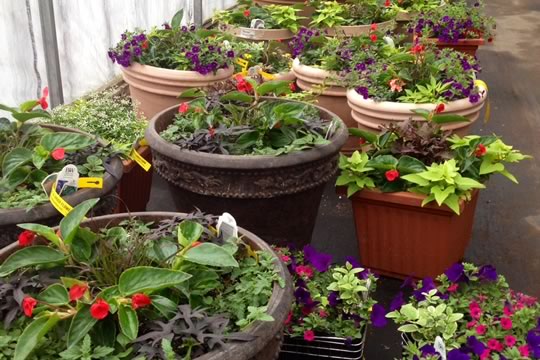
3. Less is More: Depending on container size, use only 3 or 4 varieties per container, but include a few plants of each. Our 14" and 16" round containers consist only of 3 varieties, but 7 plants.
4. Colours: Consider a colour theme, ie. blue and yellow or my favourite right now - pink and orange - yes it truly does look stunning!! Single colours can look very classy, ie. all white.
 5. Foliage: Have you seen some of the stunning foliage varieties of Coleus or Sweet Potato Vine that we grow? Ensure you use at least 1 foliage plant for every 2 or 3 flowering plants.
6. Potting Compost: This can make all the difference to the success of your container. Use fresh potting compost each year and choose a grower quality professional product. For containers in full sun, windy locations or those that will get minimum care, use #7 compost which contains water holding gel to help prevent excessive drying. We sell bales of #1 and #7 here.
7. Fertilizer: Last, but by no means least, please fertilize! We sell 2 types of fertilizer - soluble, that is applied as you water and slow release granular, which can be applied to the surface of the soil and will last the growing season. A combination of the 2 types is ideal.
Most gardeners are familiar with the vital role that bees and other pollinators play within the ecosystem. Bees are amazing pollinators – in addition to the familiar honeybee, there are about 4000 species of native or wild bees in North America including bumblebees, carpenter bees, sweat bees, leafcutter bees and mason bees. However, due to causes that are still not fully understood, bee populations are currently in serious decline. Contributing factors may include parasites, diseases, exposure to pesticides, decline in habitat and reduction in plant diversity. By creating diverse plantings, incorporating wildflowers and native species, we can help build habitat and food sources for bees and other pollinators.
When choosing new plants for your garden, consider the following factors:
- Single flowers provide more nectar and pollen than double flowers
- Flat or shallow blossoms will attract the widest variety of bees
- Blue, yellow and purple are the most attractive colours for bees
- Bees especially love the following perennial plants: Aconitum (Monkshood), Agastache (Anise Hyssop), Aquilegia (Columbine), Aster, Echinacea (Coneflower), Geranium (Cranesbill), Lavender, Leucanthemum (Daisy), Monarda (Beebalm), Nepeta (Catmint), Rudbeckia (Black Eyed Susan), Salvia

Butterflies are some of the most beautiful and interesting creatures on earth and can be easily attracted to your garden. Like any living creature, they have certain habitat and food preferences. Below are some tips to get you started planning your butterfly habitat:
Habitat: Sun and shelter are important. Butterflies cannot fly in wind or rain and prefer sunny and calm or gently breezy weather. A wood or brush pile will give them a place to rest and hide.
Plants: There are two groups of plants that will help attract butterflies. Plants that provide nectar as a food source and host plants that butterflies can lay eggs on. By planting a variety of these plants you can help attract and keep butterflies in your garden.
Nectar plants: Select a variety of nectar producing plants which will provide flowers in bloom throughout the season. It is especially important to have flowers in mid to late summer when most butterflies are active. Flowers with multiple florets that produce abundant nectar are ideal. Below is a list of nectar plants that can easily be grown in our area:
| Perennials | Annuals |
| Echinacea (Purple Coneflower) | Marigold |
| Leucanthemum (Shasta Daisy) | Aster |
| Rudbeckia (Black Eyed Susan) | Cosmos |
| Liatris | Zinnia |
| Aster | Dianthus |
| Asclepias (Butterfly Weed) | Lantana |
| Buddleia (Butterfly Bush) | Verbena - trailing |
| Echinops (Globe Thistle) | Verbena bonariensis |
| Coreopsis (Tickseed) | |
| Sedum | |
| Lavender | |
| Nepeta (Catmint) | |
| Gaillardia | |
| Achillea (Yarrow) | |
| Chives | |
Host plants: Below is a list of host plants that butterflies like to lay their eggs on and that caterpillars can feed on. Note that many of them are considered 'weeds', so it would be a good idea to keep a wild area where these plants can thrive.
Queen Anne's Lace - Black Swallowtail
Nettle - Tortoiseshells and Red Admiral
Vetch - Silvery Blue
Milkweed - Monarch
Thistle - Painted Lady
Hollyhocks - Painted Lady and Checkered Skippers
Aster - Pearl Crescent
Grasses - many including Northern Pearly Eye, Long Dash and Tawny edged Skipper
Dogwood - Spring Azure
Enjoy your butterflies!
Hummingbirds can be easily attracted to your garden by using a combination of feeders and plants. In this area, the ruby throated hummingbird is the most common species found. Hummingbirds are attracted to plants by flower colours and nectar, not fragrance and are especially attracted to certain shades of red. They are intensely curious and will not hesitate to approach any red object, even human clothing, looking for potential food sources. We are often 'buzzed' in the greenhouses and once one of our staff even had a hummingbird land on her finger! So follow the tips below to attract these fascinating Hummers into your garden.
1. Environment: Ensure that there is always a source of fresh clean water available for drinking and bathing. Create both sun and shade areas within your hummingbird habitat. Shade areas are needed for perching as well as nesting.
2. Feeders: Set out feeders in mid April. Glass feeders are recommended because soft plastic can break down, potentially adding chemical residue to the nectar solution. The best colour for your feeders is red. Keep the feeders filled with a nectar solution of a 4:1 mix of water and sugar. Do not use honey as it can carry a fungus that is fatal to hummingbirds. Do not use food colouring of any kind. Clean the feeders with warm soapy water and rinse well every 3-4 days in cool weather and more often in summer. Feeders should be left out in the fall until freezing becomes a problem. This will not prevent hummingbirds from migrating, but will provide a food source for late migrants.
3. Plants: Below is a list of both native and cultivated plants that will help attract hummingbirds.
| Perennials | Annuals |
| Agastache (Anise Hyssop) | Cleome |
| Alcea (Hollyhock) | Fuchsia |
| Aquilega (Columbine) | Mimulus |
| Buddleia (Butterfly Bush) | Nicotiana |
| Chelone (Turtlehead) | Petunia |
| Eupatorium (Joe Pye Weed) | Salvia (red) |
| Heuchera – red flowered (Coral Bells) |
Shrubs |
| Kniphofia (Red Hot Poker) | Campsis (Trumpet Vine) |
| Lobelia cardinalis (Cardinal Flower) | Lonicera (Red Honeysuckle) |
| Monarda (Beebalm) | Weigelia |
| Penstemon (Beardtongue) |

Check out this web site that tracks the life cycle and migration of Ontario's hummingbirds: www.ontariohummingbirds.ca
Many of you have commented about our new entrance gardens. They certainly had a stunning show of bulbs. The weather has been cool this Spring so the flowers have lasted really well.
Spring bulbs are easy to grow. Just remember to follow a few simple steps and they will look good for years to come.
1. Deadhead as soon as the flowers are finished. Cut the flowering stem as low as possible.
2. Leave the foliage to die down naturally. It is tempting to cut off the dying leaves, but it is very important to leave the foliage so the bulb can grow and replenish itself.
3. When the foliage can be gently pulled off instead of cut, then it can be cleaned up.
My favourite bulbs? Allium, Muscari (Grape Hyacinth), Daffodils and species Tulips. All are planted in the fall.
Happy Deadheading!
The Red Lily Beetle is a garden insect pest that has been introduced from Europe. Like all other introduced pests it has no natural predator. Although rare when it was first discovered in Ontario in 1993, it has since become much more common and is now a serious garden pest, feasting upon any type of true garden Lily, including Asiatic and Oriental Lilies. (Daylilies may be slightly affected, but the real damage is usually to the bulbous true Lilies.)
The bright red beetle is slightly larger than a Ladybug, but is spotless. Adult beetles overwinter in the soil, emerge in early spring and spend the rest of the season defoliating Lilies while laying eggs. The eggs, laid in rows are bright orange in colour and are found on the underside of leaves. They hatch in 1 week and larvae quickly begin feeding. The larvae camouflage themselves in their own waste and are easily mistaken for bird droppings. Within 14 days, they drop to the ground, where they pupate and emerge as adults 2 or 3 weeks later. The best way to control this nasty pest is to continually scout for the adults, larvae and eggs. Wipe the eggs off with a soapy cloth and drop adults and larvae into a bowl of soapy water. If you keep up with the scouting then you should be able to eliminate the pest. If your Lilies are afflicted, don't share plants with fellow gardeners as this will contribute to the spread of the pest.
Red Lily Beetle
 |
Are you tired of planting your flowers in your containers and waiting until August for them to fill out and look good? We may have the answer for you! For many years now we have been offering our customers a unique and popular service - our professional custom container planting service. Bring your empty containers over, chat with us about colours, varieties and sun / shade exposure and let us take care of the rest! I will design each container with a mix of flowers and foliage to suit your needs and likes.
Your containers are then planted with professional potting soil, given fertilizer, cared for and grown on for a few weeks. When you pick them up, expect containers to be full and beautiful. To take full advantage of our service, it is best to get your containers here as soon as you can and they will benefit from a longer growing time. However, it’s never too late – for those of you needing a quick turn around, we have been known to plant up containers and have them ready within the day.
If you are able to be organised and think ahead to the following year, I am happy to store your empty containers here for the winter. So in the fall, when you are cleaning up, contact me, arrange next years design, drop off your containers and forget about them until May!
Custom Container Planting Service
 |
One of the rewards of growing perennials is that plants increase in size over the years. As they grow, however they may outgrow their allocated space, die out in the middle, become weed infested, or maybe you just want more of the plant to spread around the garden or give to friends. Spring is an ideal time to divide summer and fall flowering perennials, although even spring bloomers can usually be divided successfully after they flower. A couple of exceptions are Peony (fall only) and Bearded Iris (summer or fall).
How to divide:
Once plants show signs of growth in the spring, dig up the whole clump. Using a sharp spade or knife, slice the clump in half. Sometimes there is a natural point where the clump can be easily separated. Once the clump is split in two, you can carry on making smaller clumps as desired. Try to keep the clumps a good size and each piece should have both green above ground shoots and roots below. Replant the clumps at about the same depth they were growing at. Water them in well at planting time and throughout the spring if dry. Enjoy your new look!

If you have a lot of sunny and hot spots in your garden, you may be all too familiar with the droopy sad look that some perennials will give you by August. With the summers heating up and most home owners needing low maintenance plantings, try out some of my favourite drought tolerant perennials that will help keep your garden looking alive even in the dead heat.
- Aster varieties
- Baptisia (False Indigo)
- Coreopsis Moonbeam or Zagreb (Tickseed)
- Dianthus varieties (Pinks)
- Echinacea (Purple Coneflower)
- Echinops (Globe Thistle)
- Gaillardia (Blanket Flower)
- Geranium Rozanne
- Hemerocallis varieties (Daylily)
- Lavender
- Ornamental grass varieties
- Perovskia (Russian Sage)
- Rudbeckia Goldsturm (Black Eyed Susan)
- Sedum varieties
- Thyme
Geranium Rozanne with Ornamental Grass in our entrance gardens. These gardens receive only rain water and are in full sun.


As some of you may know, the Flower Farm was originally founded as a fresh and dried cut flower operation. We grew thousands of plants in our front field and invited customers in to pick their own as well as selling ready cut fresh and dried bouquets. Over the years, our priorities changed as our family and businesses grew, but I still am asked for advice on drying flowers and herbs. Here are a few tips to get you started:
- Varieties: Various annuals, perennials and herb varieties can be dried. My favourites include the following:
- Harvesting: All harvesting should take place when the plants are dry from dew or rain. Cut the stems when they are at their best or just before. Trim the very bottom leaves straight into the garden. Take into a cool place to bunch for hanging.
- Drying: Choose a warm, dry location with good air flow and out of direct sunlight. A garden shed is great in the summer, but ensure that you bring your harvest into the house before the weather starts getting cold and wet in the fall. Divide the stems into small bunches and fasten tightly with rubber bands. The bunches will shrink as they dry. Hang with string or split each bunch & put over wire. Clothes hangers also work well for hanging. Bunches are dry when the end of the stems break like a dry twig.
- Storage: Herbs can be crushed and stored in airtight containers for cooking. Flowers can be left hanging as decoration or of course used to make dried arrangements and crafts. With time, expect flowers to fade.
| Annuals | Perennials | Herbs |
|---|---|---|
| Ageratum | Feverfew | Basil |
| Love Lies Bleeding | Hyssop | Rosemary |
| Celosia | Beebalm | Thyme |
| Gomphrena | Delphinium | Parsley |
| Strawflower | Ladies Mantle | Catmint |
| Statice | Sea Holly | Sage |
| Sweet Annie | Globe Thistle | Mint |
| Lavender |
Fall is a wonderful time of year in the garden. There are many tasks that can be done, but remember few are absolutely necessary! My best advice is to relax - most plants will come through the winter without any special treatment. Here are a few ideas - in approximate order (September - December).
Final weeding
Catch up now the weather is cooler. Pay special attention to ‘bad’ perennial weeds - thistle, vetch, bind weed, couch grass etc.
Take photos, make notes & plans
Walk around your garden with a ‘critical eye’. Make notes & plans while everything is fresh in your mind. Was your garden lacking colour in any particular season? Are plants in the wrong place?
Perennial clean up & cut down
Cut perennials back selectively, leaving any that might have good winter interest ie. Ornamental grasses, Rudbeckia, Echinacea etc. A good set of sharp hand pruners is usually fine (Felco is the brand that is used by professionals), but some plants go faster with hand shears or even a whipper snipper. Definitely cut down all plants that wilt in the winter ie. Hosta, Daylily etc.
Definitely cut down any disease or insect prone perennials ie. Tall Phlox, Beebalm, Hollyhock
Do not cut down any woody perennials ie. Russian Sage, Lavender, Thyme, Mallow, Buddleia. The best method if you have large gardens is to throw all the cuttings onto a tarp, then drag to the compost. Remember no cutting down has to be done in fall!!
Check out the tip - Move, reorganise, divide perennials (‘renovation’)
Plant new perennials
After your garden renovating, you may find gaps for more plants. Fall is a great time to plant new plants. They will have enough time to make new roots and then be ready to take off in the Spring. Plant deep to avoid heaving from frost.
 Plant bulbs
Add a few new bulbs every year. Some multiply well (Daffodils), some die out with time or get eaten by animals (Tulips). My favourites right now are any kind of Daffodil, Muscari, Alliums & species Tulips.
Mulch / manure gardens
Now is the time to top up or apply mulch. Natural Cedar bark strips are our favourite and will help reduce weeding and watering - Yipee!! If your gardens are looking a little tired and plants struggling, adding some well rotted cow or horse manure will help as it contains more ‘food’ than wood mulch.
Check out the tip Protect tender plants for the winter
Enjoy your garden in winter!
There are two types of fertilizer
So now you have your annuals planted – either in the ground or containers. Believe it or not the most important care that you can give them is not deadheading or watering – its fertilizing! Well, watering would be good idea too… with your fertilizer! There are two types of fertilizer. Slow release granules which are placed on the soil or mixed in slightly which release food slowly over the course of the season. All our planters and hanging baskets have slow release fertilizer added, but it would be best to add more once or twice through the season, especially if the plants are heavy feeders such as Petunias. Soluble fertilizer is mixed with water and should be applied at least once a week. At the farm we fertilize with every watering and you can do this too. A combination of these two types of fertilizer is ideal for annuals and will give you fabulous blooms and strong healthy growth until or possibly even after frost hits.
Fertilize your annuals!
 |
 Ground cover is basically a perennial that spreads sideways and remains low – usually only 3 or 4” high at the most. It is planted en mass to create a carpet effect. Ground cover is often planted in areas that would be difficult to grow a wider variety of plants in – areas that may be a challenge due to soil or light such as under trees. It is also good for the beds that you don’t see too often, maybe at the back of your property or ones that you need to keep low maintenance. Some plants, however are great used front and centre such as Thyme or Moss planted in a flag stone patio. We are often asked to recommend perennials for ground cover – whether it be sun or shade, so I thought I would list my favourites below:
Sun / Part Sun Campanula Birch Hybrid (Bell Flower) – Blue bell shaped flowers in summer Cerastium (Snow in Summer) – Small woolly grey leaves and white flowers Dianthus Firewitch – Silver blue evergreen foliage and pink flowers Iberis (Candytuft) – Narrow, evergreen leaves and white flowers Phlox Red Wing (Creeping Phlox) – Bright carmine pink flowers in spring Sagina (Irish Moss) – Dark green moss foliage with tiny white flowers Sagina Aurea (Scotch Moss) – Lime green moss foliage with tiny white flowers Saponaria (Soapwort) – Pink flowers in early summer Sedum Fulda Glow – Bronze red succulent foliage with red flowers in summer Thymus Majic Carpet (Creeping Thyme) – Small scented leaves, pink flowers Woolly Thyme – Small, fuzzy silver green leaves
Shade / Part Shade Galium (Sweet Woodruff) – Finely cut glossy green leaves with white flowers Pachysandra (Japanese Spurge) – Glossy green evergreen foliage
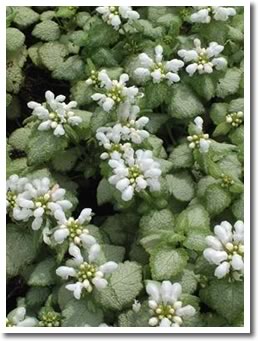
Both Sun or Shade Ajuga Burgundy Glow – Tricolor cream, pink and green foliage with short blue flowers in spring Lamium White Nancy – Silver and green leaves with white flowers in the spring (Shown in photo, courtesy of Walter's Gardens)
Have you always fancied your own fresh veggies, but don’t have the space or time for a traditional garden? Well, why not try growing some veggies and herbs in containers – grow alone or mix with ornamental plants (see photo of Swiss Chard and ornamental grass) There are many advantages to growing in containers including better control over soil conditions, easier or even no weeding and being able to locate your garden closer to the house. Containers can be placed on your deck, patio or by your kitchen door. Just ensure that the location receives at least 6 hours of sun a day.
Any container will work as long as it has some drainage holes in the bottom. Blue bins are great as they hold a good depth of soil but large plant pots or bowls are fine too. First, fill your containers with good quality potting soil. We sell a potting soil which has water holding gel in it and will help slow down drying out. If you like, mix in some garden soil, compost or rotted manure as well. Plants such as beans, peas, spinach, carrots, lettuce and radish can be direct seeded into your containers. I would recommend using one container per variety as seeds will germinate at different rates and one variety can easily outgrow and take over another. Veggies that are best purchased as started plants include tomato, pepper, eggplant, squash and zucchini, kale, swiss chard, beets, onions, broccoli and cabbage. Herbs such as basil, parsley, rosemary, thyme, oregano and sage do well in containers too. Ensure that you give each plant sufficient room to grow. Fertilize with an organic fertilizer – we sell a good fertilizer made from hen manure. Water and enjoy as you grow your garden!

Katie's Big Tip for a Flourishing Veggie Garden Ground Cover Fabric
We are lucky in Southern Ontario to have such a perfect climate for growing heat loving veggies and herbs such as Tomatoes, Peppers, Eggplant, Zucchini, Basil and many more. Try using a mulch or ground cover on your veggie garden this year and you will see benefits both in reduced work hours and increased harvests. Specific benefits include preventing weed growth, preserving moisture and warming the soil.
When we field grew cut flowers, ground cover was our secret tool and it worked amazingly! Now I use it in our veggie garden every year. Ground cover fabric is a woven polypropylene fabric, usually black - if you've ever looked down in our greenhouses this is what we lay on the ground. It is available at hardware stores or larger garden centres - sorry we do not carry it… yet! If you cannot find the correct fabric, use black plastic - not reusable though.
This is what to do:
- Till your garden and add manure or topsoil if necessary
- Lay out a sheet of ground cover fabric where you are planting vegetable plants
- Stake down well with 6" spikes
- Figure out where you are planting and slice Xs in the material
- Plant in the holes and water well as initially the plants will be shocked by the heat
- At the end of the year, cut down dead plants, pull up the fabric and reuse next year.
Try it and see the results for yourself!!
Enjoy and Good Luck!
Growing Fruit Bushes
There has been a real resurgence in veggie gardening over the past few years and by all accounts the trend will continue as more people discover the joys of growing and tending their own veggies. Not only can veggie gardening become a rewarding and all consuming hobby, but it provides a selection of healthy, cheap, fresh and delicious produce. Veggies are terrific, but what about fruit - it's easy to grow if you follow a few guidelines, is delicious and incredibly healthy - a great crop to include in your kitchen garden! 
It's easy to pop a few fruit bushes into the end of your veggie bed or any garden for that matter. The benefit of planting fruit bushes (raspberries, blueberries, strawberries etc) as opposed to fruit trees (apple, pear, plum etc) is that they will start to produce fruit soon after planting - in many cases, the same year. Here are a few tips to help you get started with your fruit patch:
- Fruit plants are perennial - your fruit bushes will produce for several years, so consider the location carefully and leave enough space for them to grow.
- Location - full sun is best, away from trees which will shade and take moisture away from the plants. Light and warmth are necessary to ripen the fruit and promote the development of next year's buds.
- Improve your soil - before you plant is an ideal time to add some well rotted manure or compost to your soil. This will help with the general health and longevity of your plants.
- Animal pests - be aware that you are not the only one who enjoys a good meal of ripe fruit. Birds, ground hogs, rabbits and deer may enjoy a nibble or a feast also. If this bothers you, be prepared to cover the bushes with chicken wire.
- Now is the time - as soon as your ground is ready, you can plant. Since the plants are perennial, they can tolerate frost, so early planting is fine.
- Katie's favourites - choose from raspberries, blackcurrants, rhubarb, gooseberries, strawberries and blueberries, but if I had to pick 3 favourites, they would be strawberries, raspberries and rhubarb. Strawberries can also be grown in pots.
Let me know how your fruit patch develops and I'll be over soon for a piece of pie!
Early to mid May is the time to plant the first veggie plants in your garden! Many new gardeners do not realize that several crops can be planted well before the last frost. These veggies are known as cool season veggies and although they can be planted later, they will establish and produce better if planted in cooler weather. They are easy to grow and are ready to harvest before warm season crops such as Tomatoes. Some crops such as lettuce and other greens do well if seeded or planted several times throughout the year.
Lettuce, mesclun mix, mustard greens, arugula, kale, beets, spinach, peas, radish, swiss chard and carrots are all veggies that can be purchased as plants or seeded directly into the garden. Whether you decide to direct seed or plant transplants is your choice. Many gardeners find planting transplants easier, but direct seeding is cheaper. If you choose to direct seed, sow thickly in a shallow row. Over sowing is used because germination at this time of the year can be dependent on the weather. Once the seeds have germinated and the seedlings are making good growth, thin the plants. Thinning, or removal of the excess seedlings allows proper spacing of the remaining plants and promotes full development.
Leeks (shown in photo), onions, cabbage, cauliflower, broccoli, brussel sprouts and asparagus are all veggies that need to be planted as transplants. They will not germinate in outdoor soil conditions. Leeks and asparagus should be mounded as they grow, but otherwise, just plant, water and weed like any other plant.
Plant now and you'll be eating fresh Lettuce before the end of June!

Late May to mid June is the time to plant the majority of veggies in your garden. By now the soil will have warmed up enough to stimulate root and shoot emergence from a seed or allow root growth from a transplant.
Beans, corn, summer and winter squash, cucumber and pumpkin are all veggies that can be purchased as plants or seeded directly into the garden. Whether you decide to direct seed or plant transplants is your choice. Many gardeners find planting transplants easier, but direct seeding is cheaper. If you choose to direct seed, sow in a shallow row. Another method that I like to use with large crops such as squashes and pumpkins is to mound up the soil in a circle about 2 - 3 feet wide and plant the seeds in the mound. Try growing scarlet runner beans up a teepee of bamboo stakes.
 Celery, peppers, tomatoes, melons and eggplant are all veggies that need to be planted as transplants. They will not germinate in outdoor soil conditions. Tomatoes can be planted up to the second set of leaves and roots will form down the buried stem. They should be staked or caged to keep the plants from falling over. Herbs such as basil, parsley, coriander, rosemary, and dill can also be planted now. Add them to your veggie garden or plant in amongst flowers.
Of course, you can still plant cool season veggies such as onions, leeks, broccoli, lettuce and swiss chard now. Many people leave all the planting until now and do it all at once. If you are short on space in the garden, consider planting veggies in containers - most veggies can be successfully grown this way!
Now, weed, water and wait and you will be rewarded!
I always credit my wonderful mother for sparking my lifelong passion for plants as a young child. One of the projects we'd always have on the go was to grow plants from fruit seeds. We tried apples, oranges and grapefruits, but one of the most rewarding fruits to grow from seed is Avocado. This is a great project for kids or adults and is fun to do at this time of the year when you can't get into the garden yet! Here's how to do it...
- Wash the seed. Using 3 toothpicks, suspend it broad end down over a water filled glass to cover about an inch of the seed.
- Put it in a warm place out of direct sunlight and replenish water as required. Roots and stem should sprout in about 2 to 6 weeks.
- When the stem is 6 - 7" long, cut it back to about 3".
- When the roots are thick and the stem has leafed out again, plant it in good quality potting soil in a 10" diameter pot, leaving the seed half exposed.
- Keep in a sunny location and give frequent, light waterings. Soil should be moist but not saturated.
- When the stem is 12" high, cut it back to 6" to encourage branching.
- Enjoy as a houseplant. The plant can be kept outside in the summer, but remember to move it back indoors before the first frost in the fall.
We can grow a variety of melons here in south west Ontario, including watermelon, honeydew and cantaloupe. Melons do require a long, hot summer, so a little luck is needed with the weather, but there are also some tricks you can try to grow a successful crop. Fancy growing your own this summer?
Here’s what to do:
-
Start your own seeds indoors or purchase some of our plants here.
-
When all danger of frost has passed in June, choose the sunniest and hottest location you can find to plant your melons. Planting close to a building can help generate additional heat. Dig a large hole in the garden and put in a good quantity of organic matter. Well rotted cattle manure or compost is excellent. Alternatively, try planting directly into your compost heap.
-
Plant your transplants. Be extra careful not to damage the stem. All squash and melons are very sensitive to damaged roots and stems.
-
If you can locate some reflective material, place it around the plants. This will help create additional light and heat.
-
Keep your plants well watered and enjoy watching them grow. You should hopefully have a crop before the first frost.
Good luck & have fun!
 |
For the best choice of annuals, it is ideal to be here and purchase as soon as possible in the spring. However, most years the weather is not yet reliably warm, even by Victoria Day weekend and it is safer not to put your new annual plants directly outside. If you wait until later, there are no guarantees that you will get the plants you wanted! It’s a catch 22!
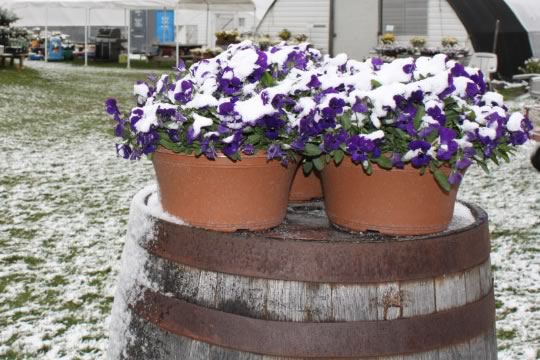
This is what I suggest: Buy now and harden off your annuals at home. Put your new hanging baskets, planters or individual pots or trays of plants outside in a sheltered location in the day and if the temperature is forecast to drop below 5°C, move them back inside the house or in a shed at night. Do this for a week or two or until you consider it safe to plant. This method is called ‘hardening off’ and it gets the plants acclimatized to being outdoors gradually. That way, when you do plant them they will be more accustomed to wind, rain, cold etc. Even if you do decide to take the plunge and plant early and we don’t get frost, the ground will not yet be warmed up enough for any growth to take place. The plants may not die due to frost, but they will just sit there waiting for some heat before they start to root in and grow. Of course, violas, perennials and shrubs are fine to plant anytime and are not affected by frost.
Snow on Violas
 |
 There’s nothing like the taste of a fresh tomato picked straight from your garden on a hot summer’s day in August – cherry, beefstake, plum or heritage varieties in shades of red, yellow or green – they are all so juicy and flavourful and soooo much better than the supermarket selection! We are lucky here in southern Ontario to have a great climate for growing tomatoes outdoors and with such a huge selection of varieties, there is sure to be a tomato to suit every taste! Follow a few tips to grow amazing tomatoes in containers or in the ground this season!
- Pick a spot in full sun.
Tomatoes need the heat and sun to ripen. - If growing in the ground, improve your soil with compost or manure. If growing in a container, use good quality potting soil in a pot with drainage holes. The pot should be at least 16” in diameter as most tomatoes plants grow quite large.
- Pick your numbers and varieties. How many tomatoes are you going to eat? Are you planning on canning or just eating fresh? I grow about 18 plants in my garden, but probably about 6 to 8 tomato plants is adequate for a family who likes tomatoes but is not doing any canning. As for varieties, do you like cherry tomatoes, beefstake, plum for sauces? How about trying some heritage tomatoes that come in a range of colours and sizes with names like Big Rainbow, Emerald Evergreen or Purple Russian?
- Plant when all danger of frost has past and the ground is warming up. If you plant too early you will not gain any advantage as they will only survive, not actively grow. I plant my tomatoes mid June into very warm ground and they give me a great crop.
- Plant deep - up to the 2nd or 3rd set of leaves. The buried stem will grow roots and give a sturdier, healthier plant. Water well after planting.
- Stake or cage your tomato plants to provide support.
- If you have prepared your soil well, fertilizer should not be necessary, but if you have poor soil use a tomato fertilizer. We carry an organic, pelletted type which you can sprinkle on top of the soil once a month. If you are growing in a container, you should definitely fertilize.
- Water as required through the growing season. Watering in the early morning or evening is ideal. Tomatoes are fairly drought tolerant plants – remember, they like it hot and dry, so be careful not to overwater.
- Keep a watch for any bugs or diseases.
 The tomato hornworm is a caterpillar that can do a lot of damage – although they are certainly very cool creatures to observe.
 - Your tomato plants will produce flowers all season, which will turn into fruit. Fruit is green at first, then gradually matures into the fully ripened colour.
- Towards the end of the season, if you have a lot of green fruit which may not have time to ripen you can take some foliage off your plant to allow extra sun to reach the fruit.
- Once the frost hits in the fall, your tomato plant will die and fruit will be damaged, so be sure to harvest all your ripened fruit before then. Green tomatoes can be ripened on a window sill in the house.
Good luck and Bon Appetit!!
 The benefits of home grown produce are huge - cheaper, fresher, more flavourful and extremely satisfying! If you are new to veggie gardening, don't be daunted - these simple guidelines are easy to follow and intended for beginner veggie gardeners.
Choose your location and size - Choose a level site with at least 8 hours of direct sun. Close to the house is preferable as usually the water supply will be at the house and harvesting is more convenient. 16' x 20' is a good size for a family of 4, although you may want to start smaller this year - you can always increase in size next year.
Prepare the soil - If the site was previously a garden, add some compost or manure, then dig in by hand or till with a motorized tiller. If the site is currently lawn, remove the sod and add triple mix topsoil, then manure or compost. Till after each addition. Do not prepare the soil if the ground is still too wet - wait for it to dry up.
Choose your crops - tomatoes, peppers, squash, cucumbers, beans, lettuce, swiss chard, eggplant and why not some basil and parsley too. These are all good choices for beginners and can be grown from transplants, avoiding dealing with seed. Grow only those veggies that you enjoy eating!!
Plant - Plant the above crops after all danger of frost has passed - usually the beginning of June in this area. Some crops can be planted earlier, but stick with these easy ones for your first year! Lay out your plants in the pots before planting and plan where the walkways will be, if required. Larger crops such as squash, cucumbers and tomatoes will need to be spaced about 2' apart, whereas lettuce, swiss chard and beans can be placed 4 - 6" apart. Plant in a hole a bit wider than the plant and ensure the plant is at the same depth as it was in the pot. One exception to this rule is tomatoes - they can be planted deeper, up to the 2nd set of leaves. Water well after planting.
Care - Ensure that you stay on top of weeding and water well during dry periods. The best time for watering is early morning or evening. Keep a look out for insect pests. Tomatoes can be caged or staked as they grow.
Harvest - This is the best part - pick ripened crops frequently to encourage more production. Eat up and enjoy your newfound success as a veggie gardener!!
Kids Gardening Gardening with kids can be so much fun, especially starting young when the wonders of soil, newly sprouted seeds and bugs can be so enchanting to a child. Here are a few gardening projects that Rosalyn, Daniel and Ben enjoy each summer:
- Grow some Gourds & Mini Pumpkins: These ornamental veggies are easy to grow, the perfect size for little ones. Our kids enjoy playing with the fruits long after they have harvested them. This year, we are growing both types along with regular Pumpkins and Giant Bottle Gourds.
- Plant a Runner Bean teepee: Make a teepee out of 6 foot long bamboo canes and plant Scarlet Runner Bean seeds or plants at the base of each pole. By the end of the summer, the kids will have a great hide out, along with a good crop of fresh Beans (harvest young or else you will have to de - string them). Plants available at the farm.
- Plant a Sunflower circle: Plant some tall, branching Sunflowers in a circle to create another great living hideout. Leave the Sunflowers standing through the winter and the kids can watch the birds feast on the seeds. This year we have grown a tall branching variety called Ring of Fire.
Have fun kids!!
P.S. Don’t forget to leave space for a door in the hideouts!!
Enjoy and Good Luck!
What is mulch?
Spring is a perfect time of year to mulch your gardens - while perennials are still small and you can easily move around in the bed. Mulch is basically a layer of either organic or inorganic material that is laid down on top of the soil. Organic mulches will gradually break down over time, and become incorporated into the soil, helping to improve the soil structure. Shredded bark mulch is the most popular organic mulch, but you can also use wood chips, leaf mulch, composted manure or straw. Bark mulch and wood chips will take longer to break down than the other choices. Inorganic mulches have different benefits as they will not break down and include stone, black plastic sheeting or groundcover fabric. I usually restrict the uses of these inorganic mulches to pathways or vegetable gardens. In veggie gardens groundcover fabric can be lifted in the fall and the soil worked and improved. In permanent ornamental gardens, however you will not be able to improve the soil once it is down.
The benefits of mulching your gardens:
- Weed control - Both organic and inorganic mulches help suppress weeds. Seeds are blocked from the sun under a dark layer of material and most weed seeds are unable to germinate.
- Soil improvement - Organic mulches break down over time and help improve the soil structure so that roots are better able to absorb water and nutrients from the soil. Composted manure mulches will also enrich the soil with minerals and other plant nutrients.
- Water conservation - All mulches will help keep moisture in the soil by helping to prevent water evaporation.
- Soil insulation - Mulch will help keep soil temperatures even in both the hot summer and cold winter, therefore improving plant health. Black plastic sheeting or groundcover fabric can help heat up the soil early in the year so that vegetables can get off to a better start.
How to apply mulch:
Carefully spread 2-3” of mulch around your plants in late spring when plants are small enough to work around. Keep about 2” away from the base of plants to give perennials room to grow and help prevent rotting. Organic mulch such as leaf mulch, composted manure or straw can be worked into the soil and replaced each year. Shredded bark or wood chip mulches will last longer, but usually have to be topped up every 3 years.
We use shredded Cedar bark mulch on all our landscaping projects and we have it for sale at the farm both in bags and bulk. We also sell composted manure Nincompoop mulch in bags.

 Follow the simple tips below to make your visit to Cut and Dried Flower Farm more productive and enjoyable!
- Make notes at home – prepare a list of plants. If you are not sure what you would like just make good notes of sun / shade exposure, favourite colours and size of the bed or containers. Photos are great to help us get an idea of your requirements.
- Come dressed for the weather – layers are great. Greenhouses are warm and all our plants except shrubs are under cover but you will still have to walk between greenhouses. ‘Sensible’ shoes are a good idea too as our ground can be uneven.
- Bring the whole family for an outing – we are not like other garden centres. We are equipped for all ages! We have an unsupervised play area for kids and shady chairs for older folks.
- Give yourself plenty of time – try not to rush your visit. We encourage you to browse through our perennial display gardens for inspiration and take the time to decide on your purchases without feeling rushed. On busy days please be prepared to wait in line at the checkout. It’s a great time to catch up with your neighbours and meet fellow gardeners!
- Avoid busy times – typically weekends are always busy so if you can shop during the week we can usually give you better service. If you can’t avoid weekends, early is better than late – a Sunday morning is usually quiet.
- Make sure you have enough room in your car – if you are planning big purchases unload your car before you come to avoid making two trips! (Although we are excellent at ‘creative loading’!)
- Plan not to take plants home in the back of an uncovered truck – as plant professionals, we never transport plants without protection. Even going slowly and not too far can wind damage plants and set them back.
Fall is here and with it usually comes some fabulous weather for gardening. This time of year is perfect for moving, dividing and reorganising perennials, while the details of our gardens are all still fresh in our minds!
When?
After Thanksgiving, when you have completed a thorough clean up and cut down of your perennials. It is much easier to make sense of the garden then.
Plan and think...
Look your garden over with a critical eye. Try to imagine what plants would look like in a different spot. Think of colour, bloom time and height. Is there a particular season when colour is lacking? Check out some photos that you may have taken through the season.
Go for it!
Get out a sharp spade and wheelbarrow. Try to reorganise your garden into large groups of perennials. Over the years, some plants may have seeded or spread wildly. Take them out! Be ruthless with anything that is not performing. Some perennials die out in the centre and this is a good indication that they are ready to be divided to maintain vigor. Dig out the whole clump, chop it up and replant smaller clumps. Make some spaces for some new plants, and give away extra plants.
Have fun, wait and watch all your hard work blossom in the spring!

I love shady gardens. Cosy and cool, what better place to hang out on a hot summer’s day? Here are some of my favourite perennials and shrubs suitable for shade or semi shade.
| Perennials: | Shrubs: |
|---|---|
| Aconitum - Monkshood | Climbing Hydrangea |
| Actaea - Bugbane | Cornus - Dogwood |
| Actaea - Bugbane | Hydrangea |
| Astilbe - False Spirea | Sorbaria - False Spirea |
| Brunnera - Siberian Bugloss | Virginia Creeper Vine |
| Chelone - Turtlehead | |
| Dicentra - Bleeding Heart | |
| Digitalis - Foxglove | |
| Epimedium - Barrenwort | |
| Fern | |
| Galium - Sweet Woodruff | |
| Helleborus - Christmas Rose | |
| Heuchera - Coral Bells | |
| Hosta | |
| Lamium | |
| Ligularia - Elephant Ears | |
| Pachysandra - Japanese Spurge | |
| Primula | |
| Pulmonaria - Lungwort | |
| Rodgersia | |
| Tiarella - Foamflower | |
| Tricyrtis - Toad Lily | |
| Vinca - Periwinkle |
Now is the time to ensure that your garden is properly put to bed for the winter. Attention needs to be paid to the not so hardy plants to ensure that they survive our wild winters and emerge safe and sound in the spring. I find that there can be confusion over this issue and many people do not realize that some Roses are not hardy in our climate and benefit from protection. Any plant designated a zone 5 or more needs winter protection.
 Shrubs needing winter protection include Azalea, Rhododendron, Boxwood, Magnolia, Rose of Sharon, Japanese Maple and all Roses - except Shrub and Rugosa types. Zone 5 perennials commonly grown in this area include various Ornamental Grasses, Russian Sage, Helleborus, and Gaura. Just check the tag if you are not sure.
Mulching for root protection: Ensure that the plants receive adequate moisture before freeze up. Do not cut back perennials. As the ground begins to freeze (not too early), mound the base of the plant with peat, manure, topsoil or leaves to about 4 - 6" in height. By mounding around the base of the plant you are aiming to provide a more even soil temperature and help prevent the dangerous freeze thaw cycle that may heave and damage roots.
Wrapping for above ground protection: Tender shrubs and Roses will benefit from wrapping with burlap or any other breathable material. Wait until after the first heavy frost before wrapping a plant. Wrap from the ground up and tie securely with twine, or use an old plant pot or wooden boards to cover the plant. The idea is to protect the plant from drying winds and ice storms. Do not leave the covering on too late in the Spring - remove a couple of weeks before the last frost date. If you are mounding the plant as well, do this after the wrapping.
Remember, come spring, you'll be pleased you spent a little time doing these tasks now!
- Do not start seeds too early. Seedlings will become too tall and 'leggy' as they search for light. A smaller, more compact plant will perform much better when planted out in the garden.
- Keep trays covered with a plastic bag or clear cover at night and remove partially or totally during the day. Seeds require high humidity to germinate, but once established covers may create problems with moisture - see # 4.
- Give as much warmth under the trays as you can. The top of the fridge is perfect. After germination has occurred, transfer the trays to a sunny window sill as they will need lots of light.
- Do not over water. Really important!! Over watering can cause a stem rot called 'damping off' which will spread and kill seedlings fast. A laundry spray bottle is perfect for watering.
- Transplant into larger size pots once the seedlings become crowded. Keep as sunny and warm as possible. Before planting out, harden off by putting them outside on warm, still days.
Enjoy and Good Luck!

Spring is definitely the crazy time in the garden. Once the warmer weather is on us, plants start to grow fast, weeds can be hard to keep up with and the feeling of being overwhelmed can quickly develop, and the season has barely started! The key to spring survival is to start early!! Completing a thorough clean up in your gardens in April can help reduce the stress of dealing with a jungle later in May.

Here are some tips to get you started:
- Lawn first - rake up dead grass and mess from the snow blower. Clean up branches and twigs that have fallen in the winter. Maybe keep a small pile to use for plant supports in your gardens later on.Perennial gardens next - usually by mid to end of April, gardens will have dried up enough for you to work in them. Don't work in them if they are still too wet as you will compact the soil. If you complete the following 4 steps in your gardens now, you will be off to a great start!
- 1. Cut down: Cut down dead perennial stems to the new growth. Pull out dead annuals left from last year.
- 2. Weed: Complete a thorough weeding - any weeds that have survived the winter will be perennial ones, meaning they will grow fast and haunt you all year. Take a spade and dig them out now!
- 3. Edge: Re edge your beds using a sharp spade or edger tool. This will create a new, crisp edge and redefine any areas that may have lost their shape against the forever intruding lawn.
- 4. Mulch: Spread mulch now before the plants grow too much. This will help reduce weed growth later, keep moisture in the soil and look great. Use a naturally coloured cedar bark mulch for the best look.
Finally veggie garden - If you are using a rototiller, do not go onto the ground until it is thoroughly dried out, usually in May. If you are digging by hand you can work earlier. Work in compost and manure.
Spring is the busiest season of the year for most gardeners. Here are some tips for 2 jobs that I get a lot of questions about:
When & how do I cut back perennials?
Cutting back can be done in the fall or spring. Cut down to the new growth which should be emerging from the ground by now. Do not cut back woody perennials such as Lavender, evergreen perennials such as Candytuft and semi evergreen perennials such as Coral Bells. Dead parts can be trimmed off later in May. All ground cover should be left too.
When is the best time to move or divide perennials?
Spring is an ideal time to move or divide the majority of perennials. As a general rule of thumb, if the plant blooms after late June it is good to divide/move in the spring. If it blooms before the end of June, move or divide in the fall.
Enjoy and Good Luck!
 The first step in growing roses successfully is choosing the right type of rose for your garden. Different rose types require different care. Below are the main types of roses and their characteristics.
Hybrid Tea - Most widely grown of all roses. Long, narrow buds open into large, many petalled blooms, one each to a long stem. Ideal for cutting. Upright plant grows to 3 feet or more. Needs good winter protection and regular maintenance.
Climbing - Long, arching canes must be attached to supports such as trellises, arbors or fences. Large flowers bloom either continuously or repetitively. Needs good winter protection.
Floribunda - Derived from hybrid teas. Hardy and compact, 2 - 3 feet in height. Lots of flowers on medium length stems. Repetitive bloomer. Needs winter protection, although hardier than hybrid teas and climbers.
Grandiflora - Best characteristics of hybrid teas and floribundas combined. Large, vigorous, upright plants. Can grow 5 - 6 feet in height. Blooms in clusters on long stems. Needs winter protection and regular maintenance.
English Rose / David Austin - Arching canes. Fragrant blooms with many petals. Often thought of as old fashioned country garden rose. Needs winter protection.
Ground Cover - Low growing, spreading Rose. Easy care. Flowers continuously or repetitively. Benefits from winter protection.
Shrub - Broadly upright with arching canes. Vigorous, hardy and disease resistant, requiring little maintenance. Ideal for hedges, as background or mass plantings. No winter protection required.
Rugosa - Upright growing with flowers mainly on top of plant. Vigorous, hardy and disease resistant. Rosehips in fall. Low maintenance and no winter protection required.
Deadheading means removing spent or faded flowers regularly. Many gardeners can get a bit fanatical about this but it can be a time consuming task and often is not necessary. Here are my guidelines:
- If it improves the appearance of the plant, then do it. Plants such as Peony, Daylily and Hosta look instantly better from a deadheading.
- Some varieties will be encouraged to produce more flower buds and re bloom as a result of deadheading. Daisies, tall Phlox and Salvia usually respond well, where as no amount of deadheading will encourage most spring flowering perennials to re bloom.
- The seed heads of some perennials can look attractive well into fall and can be left. Rudbeckia, Heliopsis, Ladies Mantle and Astilbe spring to mind. This can help create a range of interesting texture in the garden.
The general rule is there is no rule, remember they are all perennials and will grow back again next year. Just do what you have time for and what you think looks best!!


 © Copyright 2026 Cut and Dried Flower Farm